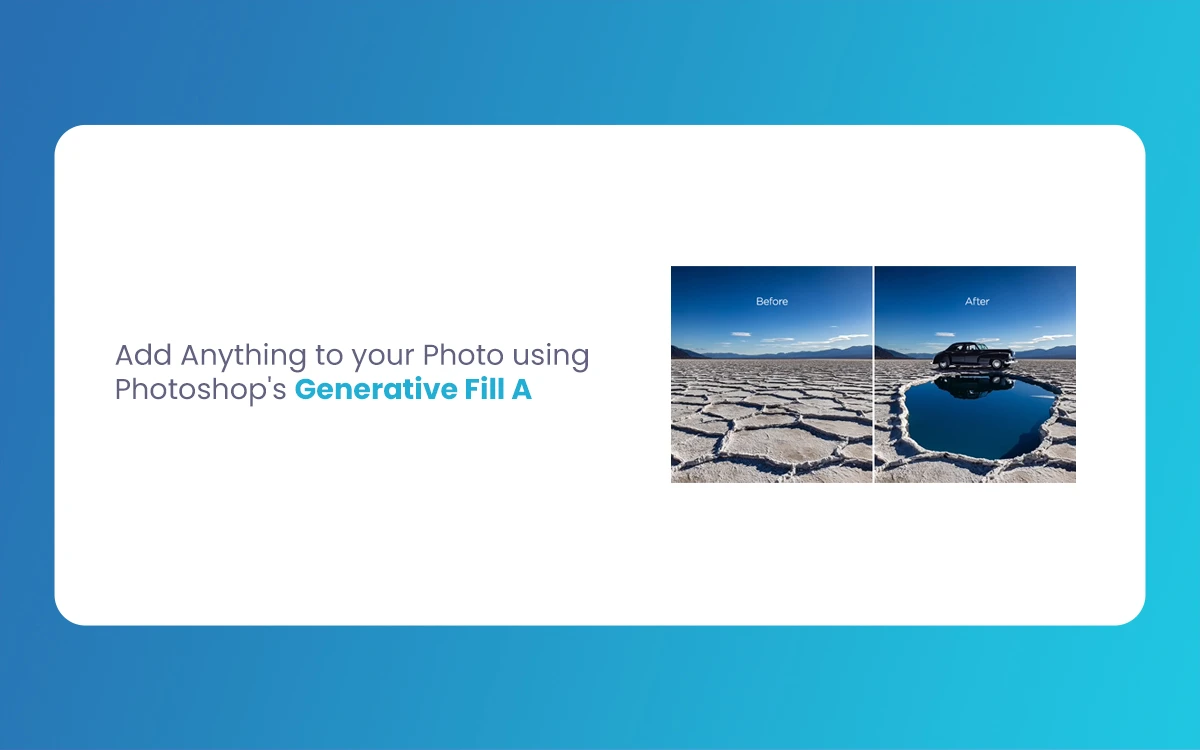
Adobe Photoshop has revolutionized the photo editing environment with its Generative Fill AI feature. This powerful tool harnesses artificial intelligence to perfectly add, remove, or modify elements in your photos with remarkable ease and precision. Whether you’re a professional photographer, a graphic designer, or simply someone who enjoys enhancing personal photos, Generative Fill AI offers an intuitive way to transform your images without requiring advanced Photoshop skills.
The Morphic Studio shares the process of using Photoshop’s Generative Fill AI to add virtually anything to your photos while maintaining a natural, cohesive look. You’ll learn not only the technical steps but also best practices and creative applications to get the most out of this revolutionary feature.
Follow Generative Fill AI
Generative Fill AI represents a significant advancement in Adobe’s implementation of generative artificial intelligence within Photoshop. Unlike traditional editing tools that require manual pixel manipulation, Generative Fill uses machine learning algorithms to understand the context of your image and create new elements that blend perfectly with the existing composition.
The technology analyzes various aspects of your photo—including lighting conditions, perspective, texture, and color palette—to generate additions that look like they were part of the original image. This contextual awareness makes Generative Fill more powerful than simple copy-and-paste editing methods.
Step-by-Step Guide to Adding Elements with Generative Fill
1. Open Your Image in Photoshop
Begin by launching Adobe Photoshop and opening the photo you wish to edit.
You can do this by selecting File > Open from the top menu or using the basic board shortcut Ctrl+O (Windows) or Command+O (Mac). Negotiate to your image file and click “Open.”
For optimal results, work with high-resolution images whenever possible. Higher resolution provides the AI with more information to analyze, resulting in more detailed and realistic generated content.
2. Make a Selection
The quality of your selection significantly impacts the final result, so take your time with this step. Photoshop offers several selection tools, each suited for different scenarios:
Lasso Tool: Ideal for freehand selections with irregular shapes
Rectangular or Elliptical Marquee Tool: Perfect for selecting geometric areas
Quick Selection Tool: Great for selecting objects with defined edges
Object Selection Tool: Helps isolate distinct objects in your image
Magic Wand Tool: Useful for selecting areas of similar color
Choose the appropriate tool based on where you want to add your new element. For instance, if you’re adding an object to an open sky, the Rectangular Marquee Tool might be sufficient. For more complex areas, the Object Selection or Quick Selection tools may yield better results.
To refine your selection, you can:
Hold Shift to add to your selection
Hold Alt (Windows) or Option (Mac) to subtract from your selection
Use Select and Mask workspace for precise edge refinement
3. Activate Generative Fill
Once you’ve created your selection, you can access Generative Fill through multiple methods:
Method 1: Right-click on your selection and choose “Generative Fill” from the context menu.
2: Negotiate to Edit > Generative Fill in the top menu.
3: Use the basic board shortcut Shift+Ctrl+G (Windows) or Shift+Command+G (Mac).
Method 4: Look for the Generative Fill button in the contextual toolbar that appears at the top of the workspace after making a selection.
4. Enter Your Prompt
After activating Generative Fill, a prompt box will appear where you can describe what you want to add to your image. The effectiveness of the generated content largely depends on the clarity and specificity of your prompt.
Tips for writing effective prompts:
Be specific: Instead of “add a tree,” try “add a tall pine tree with snow on its branches”
Include details about style: For example, “add a watercolor-style butterfly”
Specify positioning: “Add a small dog sitting in the foreground”
Mention lighting conditions: “Add a lantern with warm glowing light”
Include contextual elements: “Add a wooden bench facing the sunset”
The more precise your prompt, the better the AI can interpret your vision and generate suitable content.
5. Generate and Review Variations
Click the “Generate” button after entering your prompt. Photoshop will process your request and typically produce three variations based on your description and the context of your image. These variations appear in the Properties panel on the right side of the screen.
Each variation represents a different interpretation of your prompt. You can browse through them by clicking on each thumbnail and select the one that best matches your vision by clicking on it once more to apply it to your image.
If none of the variations meet your expectations, you can:
Modify your prompt to be more specific or descriptive
Click “Generate” again to get new variations
Try a slightly different selection area
Break down complex additions into multiple smaller generations
6. Enhance Details (Optional)
For larger generated elements (particularly those exceeding 1024 pixels in either dimension), you may notice some softness or lack of fine detail. Photoshop addresses this with the “EnhanceDetail” feature found in the Properties panel after applying your chosen variation.
Clicking “Enhance Detail” prompts the AI to refine the generated content, adding more definition and sharpness to make it match the resolution quality of your original image. This process may take a few moments but can significantly improve the realism of your addition.
7. Fine-Tune and Blend
One of the advantages of Generative Fill is that it creates your new content on a separate layer with a layer mask, preserving your original image. This non-destructive approach gives you the freedom to make additional adjustments to perfect the integration of your new element.
Consider these techniques for further refinement:
Adjust opacity: Lower the opacity of the generated layer to blend it more subtly
Apply layer styles: Use drop shadows, outer glows, or other layer styles to enhance integration
Use adjustment layers: Create adjustment layers (Curves, Magnitudes, Hue/Saturation) clipped to your generated layer to match color tones
Refine the layer mask: Use a soft brush on the layer mask to fade edges or hide portions that don’t look natural
Apply filters: Consider filters like Gaussian Blur for softening edges or Camera Raw filter for matching general image treatment
8. Save or Export Your Image
Once you’re satisfied with your edits, preserve your work by saving it in an appropriate format:
PSD format: Save as a Photoshop (.psd) file to maintain all layers and editability for future adjustments
TIFF format: For high-quality images with layers that might need to be edited later
JPEG format: For sharing or web usage where smaller file sizes are needed
PNG format: For maintaining transparency if present in your image
To save, go to File > Save As and select your preferred format from the dropdown menu.
Practical Applications and Examples
Example Workflow: Adding a Castle to a Landscape
Let’s walk through a specific example to illustrate the process:
Open a environment photo with an open area where the castle could realistically stand
Select the area using the Lasso Tool to create an irregular shape on a hillside
Activate Generative Fill by right-clicking and selecting “Generative Fill”
Enter the prompt: “Medieval stone castle with tall towers and flags on a sunny day”
Review the variations and select the one that best fits the landscape
Enhance details to sharpen the castle architecture
Fine-tune by adjusting the layer mask to better blend the castle foundations with the terrain
Save the finished image as both a PSD file (for future editing) and a JPEG (for sharing)
Generative Fill AI By The Morphic Studio
Common Use Cases for Generative Fill
Generative Fill AI excels in numerous creative and practical scenarios:
Environment enhancement: Adding dramatic skies, mountains, or bodies of water
Portrait photography: Inserting new backgrounds or environmental elements
Product photography: Adding or changing background settings for products
Real estate imagery: Visualizing potential property improvements or furnishings
Creative composites: Combining elements from different contexts into surreal scenes
Conceptual designs: Quickly visualizing ideas without needing to create every element from scratch
Content removal: Eliminating unwanted objects and having AI fill the space naturally
Tips for Optimal Results
Challenge
Solution
Example
Blurry generations
Use “Enhance Detail” feature
A generated building appears soft – enhance details to sharpen architecture elements
Unrealistic lighting
Refine prompt to specify lighting conditions
Add “in golden hour lighting” to match sunset scenes
Perspective issues
Make selections that respect the image’s perspective lines
When adding furniture to a room, range selection with floor perspective
Size discrepancies
Include size references in prompts
Instead of “add a dog,” specify “add a small puppy” or “add a large German Shepherd”
Style mismatch
Specify artistic style in prompt
Add “in watercolor style” or “with photorealistic details”
Color harmony problems
Use adjustment layers to match color temperature
Apply Color Balance adjustment layer to match cool or warm tones
Edge integration issues
Refine layer mask with soft brush
Soften edges where generated mountain meets existing terrain
Complex scenes
Break down into multiple smaller generations
Add trees first, then animals, then structures in separate steps
Detail preservation
Work at higher resolutions
Use 300dpi images instead of 72dpi for better detail retention
Consistent lighting
Match light direction in prompt
Specify “lit from the left” to match existing shadows
Advanced Techniques
As you become more comfortable with Generative Fill, consider these advanced approaches:
Combining Multiple Generations
Rather than attempting to generate complex scenes in one go, build them progressively:
Generate the main element first
Make new selections for additional elements
Generate each new component with consideration of previously added elements
Blend each new addition carefully with adjustment layers
Using Reference Images
For more precise results:
Keep reference images open in separate tabs
Use specific descriptive terms from these references in your prompts
Match colors and lighting conditions using the references as guides
Integration with Traditional Techniques
Generative Fill works best when combined with traditional Photoshop skills:
Use Generative Fill for initial content creation
Apply manual retouching for finest details
Engage traditional compositing techniques for perfect integration
Add manual shadows and says for consistent lighting
Limitations and Considerations
While powerful, Generative Fill does have some limitations to be aware of:
Ethical considerations: Clearly disclose AI-generated content in professional contexts and respect copyright laws
Technical constraints: Very complex or highly specific elements may require multiple generations or manual refinement
Processing requirements: Generative operations can be resource-intensive on your computer
Consistency challenges: Maintaining consistent lighting and perspective across multiple generations requires attention to detail
Style limitations: Some artistic styles may be more challenging for the AI to replicate accurately
Finally
Photoshop’s Generative Fill AI represents a significant leap forward in accessible, AI-powered image editing. By Following its capabilities and the workflow defined in this guide, you can perfectly add virtually any element to your photos while maintaining photorealistic quality and integration.
The non-destructive nature of this feature encourages experimentation, allowing you to try different ideas without compromising your original image. As you gain experience with Generative Fill, you’ll develop an intuition for crafting effective prompts and making selections that yield the best results.
Whether you’re creating realistic compositions for commercial projects or exploring imaginative concepts for personal work, Generative Fill empowers you to bring your creative vision to life with unprecedented ease and flexibility. The technology continues to develop progress, so regular practice will help you stay at the forefront of this exciting new frontier in statistical image editing.
Think of that while AI tools can dramatically speed up your workflow, they work best when guided by your creative vision and refined with your artistic judgment. Generative Fill is not just a technical tool but a creative partner that expands the boundaries of what’s possible in statistical imagery.
How To Add Real Life Bunny in Photo Using Adobe Photoshop (Beta) Version 24.6
In statistical image manipulation, adding animals to photos has become a popular technique for creating whimsical, heartwarming, or professionally styled images. Whether you’re a photographer looking to enhance pet portraits, a graphic designer working on promotional materials, or simply want to add a cute bunny to your family photo, Adobe Photoshop (Beta) Version 24.6 offers […]
April 29, 2025
How To Use Blender Bundle of Unique Assets for Game Developers
Game development is a complex process that demands both creativity and technical skills. One way to streamline this process is by utilizing asset Blender Bundle—collections of pre-made 3D models, materials, and textures that can significantly accelerate development. Blender, as one of the most powerful free 3D creation suites, serves as an excellent platform for working […]
April 23, 2025
How to use Lens Blur and Point Color in Lightroom in Photoshop
Creating professional-looking photos often relies on two basic elements: controlling depth of field through blur effects and precise color manipulation. Adobe’s powerful editing tools—Lightroom and Photoshop—offer sophisticated features to achieve these effects through Lens Blur and Point Color functionalities. Whether you’re a portrait photographer looking to create dreamy backgrounds or a product photographer needing precise […]