In video editing, the ability to freeze a moment can be a powerful storytelling tool. Whether creating a dramatic pause, emphasizing a particular action, or Simply adding visual interest to your project, mastering the art of Freeze Frame in Premiere Pro is essential for any video editor. Adobe Premiere Pro, one of the industry-leading video editing software, offers several methods to achieve this effect with precision and creativity.
We share various techniques to create Freeze Frames in Premiere Pro, from the simplest methods to more advanced approaches. Once you go through the complete information we share, you’ll understand how to implement freeze frames effectively in your projects, elevating your editing skills and enhancing your storytelling capabilities.
How to Understand Freeze Frame in Premiere Pro
Before we dive into the specific techniques, let’s briefly discuss what a Freeze Frame in Premiere Pro is and why it’s used in video editing.
A freeze frame, also known as a still frame or hold frame, is a single frame of video that is repeated for an extended duration, creating the illusion that time has stopped. This technique can serve various purposes in video production:
Emphasizing a moment: By freezing a specific frame, you can draw the viewer’s attention to a particular action or expression.
Creating dramatic effect: Freeze frames can build tension or create a pause for reflection in your narrative.
Enhancing transitions: They can serve as a bridge between scenes or help smooth out abrupt changes in your video.
Adding visual interest: Freeze frames can break up the rhythm of your video, adding a energetic element to your editing style.
Now that we understand the concept and importance of freeze frames, let’s take a look at the different methods to create them in Premiere Pro.
Method 1: Insert Frame Hold Segment
The “Insert Frame Hold Segment” method is one of the quickest and easiest ways to create a Freeze Frame in Premiere Pro. This technique allows you to insert a static frame at any point in your clip without affecting the rest of the footage.
Steps to Insert a Frame Hold Segment:
Position the playhead at the exact frame you want to freeze in your timeline.
Right-click on the clip containing the frame you wish to freeze.
From the context menu, select “Insert Frame Hold Segment.”
Premiere Pro will automatically insert a 2-second freeze frame at the playhead position.
To adjust the duration of the freeze frame, simply drag the edges of the newly created segment in the timeline.
Advantages of Insert Frame Hold Segment:
Quick and easy to implement
Doesn’t affect the rest of your clip
Allows for precise placement within your timeline
Easy to adjust the duration of the freeze frame
Considerations:
The default duration is 2 seconds, which may need adjustment depending on your project needs.
This method creates a new segment in your timeline, which might require rearranging other clips if you’re working with a tightly edited sequence.
Method 2: Add Frame Hold
The “Add Frame Hold” technique is another straightforward method to create a freeze frame, but it works differently from the Insert Frame Hold Segment. This approach freezes the entire clip from the point you select to the end of the clip.
Steps to Add a Frame Hold:
Move the playhead to the frame you want to freeze.
Right-click on the clip and select “Add Frame Hold” from the context menu.
Premiere Pro will cut the clip at the playhead position and freeze the rest of the clip from that point onward.
Advantages of Add Frame Hold:
Simple to execute
Useful when you want to freeze the final portion of a clip
Doesn’t create a new segment in your timeline
Considerations:
This method affects the entire latter portion of your clip, which may not be desirable if you only want a brief freeze frame.
You may need to trim the frozen portion of the clip if it’s longer than needed.
Method 3: Export Still Frame
Exporting a still frame and then reimporting it into your project offers a different approach to creating Freeze Frame in Premiere Pro. This method gives you more flexibility in terms of image quality and the ability to use the still frame in multiple places within your project.
Steps to Export and Use a Still Frame:
Step#1. Position the playhead on the frame you want to freeze.
Step#2. Click the “Export Frame” button located below the Program Monitor.
Step#3. In the Export Frame dialog box, choose a name and file format for your still image.
Step#4. Make sure to check the “Import into project” option.
Step#5. Click OK to export the frame and import it into your project.
Step#6. Locate the exported still image in your Project panel.
Step#7. Drag the still image from the Project panel into your timeline where you want the freeze frame to appear.
Advantages of Exporting Still Frames:
Allows for higher quality freeze frames, for the most part useful for projects requiring 4K or higher resolution
The exported frame can be used multiple times throughout your project
Provides the opportunity to edit the still image in other software before using it in Premiere Pro
Useful for creating custom thumbnails or poster frames for your video
Considerations:
This method requires more steps than the previous techniques
You’ll need to manage additional files in your project
The duration of the freeze frame is determined by how long you place the still image in your timeline
Method 4: Time Remapping
Time Remapping is a more advanced technique that offers precise control over the speed of your clip, including the ability to create Freeze Frame in Premiere Pro. This method is particularly useful when you want to combine freeze frames with speed changes in a single clip.
Steps to Use Time Remapping for Freeze Frames:
Step#1. Select the clip you want to work with in your timeline.
Step#1. Go to the Effect Controls panel and expand the “Time Remapping” section.
Step#1. Click on the stopwatch icon next to “Speed” to enable basicframe animation.
Step#1. Move the playhead to where you want the freeze frame to start.
Step#1. Click the Add/Remove Basicframe button (the diamond icon) in the Effect Controls panel to add a basicframe.
Step#1. Move the playhead to where you want the freeze frame to end.
Step#1. Add another basicframe at this position.
Step#1. Click and drag the second basicframe down until it ranges perfectly with the first basicframe. This creates a horizontal line between the two basicframes, indicating a speed of 0%, effectively freezing the frame.
Advantages of Time Remapping:
Offers the most precise control over the timing and duration of freeze frames
Allows for smooth transitions in and out of the freeze frame
Can be combined with other speed adjustments for creative effects
Doesn’t create additional clips or segments in your timeline
Considerations:
More complex to set up compared to other methods
Requires a good understanding of basicframe animation
May impact the general duration of your clip
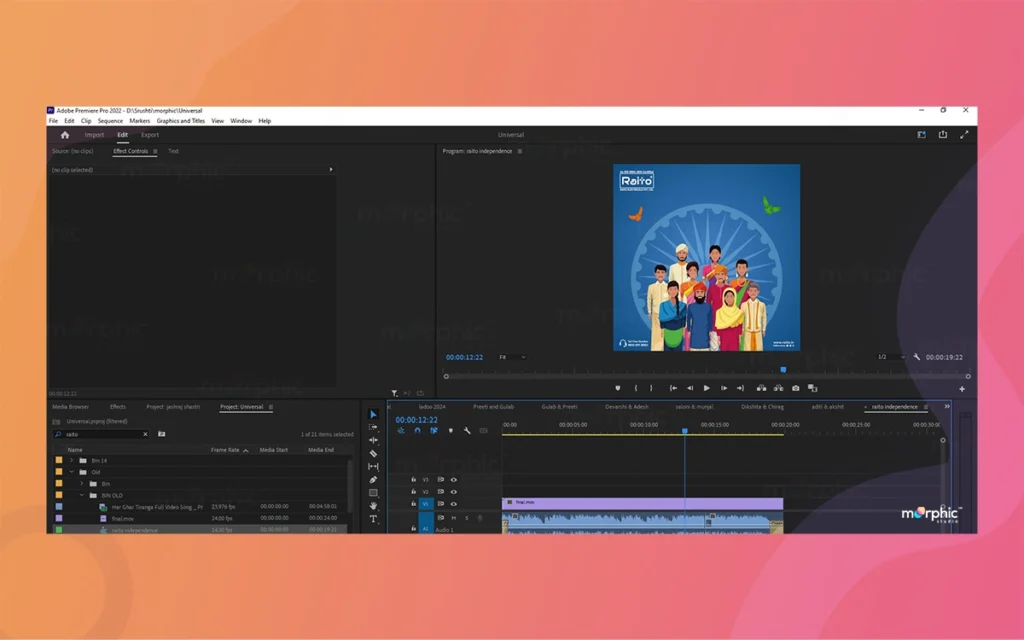
Freeze Frame in Premiere Pro By The Morphic Studio
Comparison of Freeze Frame Methods
To help you choose the best method for your specific needs, here’s a comparison table of the four Freeze Frame in Premiere Pro techniques we’ve discussed:
Method
Ease of Use
Precision
Flexibility
Impact on Original Clip
Best For
Insert Frame Hold Segment
Easy
High
Medium
Low
Quick, isolated freeze frames
Add Frame Hold
Very Easy
Medium
Low
High
Freezing the end of a clip
Export Still Frame
Medium
Very High
High
None
High-quality freeze frames, multiple uses
Time Remapping
Advanced
Very High
Very High
Medium
Complex speed adjustments, smooth transitions
Tips for Effective Freeze Frames
Now that we’ve covered the various methods to create freeze frames in Premiere Pro, let’s discuss some tips to make your freeze frames more effective and professional:
Choose the right moment: Select a frame that is visually interesting and relevant to your story. Avoid blurry or unclear frames.
Consider the duration: The length of your freeze frame can significantly impact its effectiveness. Too short, and it might be missed; too long, and it could disrupt the flow of your video.
Use transitions: Applying subtle transitions in and out of your freeze frame can make it feel more natural and less jarring.
Add motion to still frames: Consider applying gentle zooms or pans to your freeze frames to maintain visual interest, for the most part for longer durations.
Experiment with stylization: Try adding effects like color grading, vignettes, or film grain to your freeze frames to enhance their impact.
Combine with audio: Use sound effects or music cues to emphasize your freeze frames and create a more providing experience.
Be consistent: If you’re using multiple freeze frames in your project, maintain a consistent style and duration to create a cohesive look.
Consider the context: Ensure that your freeze frames serve a purpose in your storytelling and don’t distract from the general narrative.
Creative Applications of Freeze Frames
Freeze frames can be used in various creative ways to enhance your video projects. Here are some ideas to inspire your next edit:
Action sequences: Freeze basic moments in fast-paced scenes to emphasize important details or create suspense.
Character introductions: Use freeze frames with on-screen text to introduce characters in a stylish way.
Flashbacks or memories: Transition into flashback sequences by freezing the current scene and then dissolving into the past.
Comedic effect: In comedy videos, freeze frames can be used to says funny expressions or reactions.
Sports analysis: Freeze important moments in sports footage to analyze techniques or plays.
Music videos: Create rhythmic visual patterns by synchronizing freeze frames with the beat of the music.
Documentary-style emphasis: Use freeze frames to underline important points or quotes in documentary-style videos.
Split-screen effects: Combine multiple freeze frames in a split-screen layout to show simultaneous reactions or as a results.
Troubleshooting Common Issues
Even with these powerful tools at your disposal, you may encounter some challenges when working with freeze frames. Here are solutions to some common issues:
Choppy playback: If your freeze frames are causing choppy playback, try rendering the affected expanse of your timeline or creating proxy files for smoother editing.
Loss of quality: For high-quality freeze frames, consider using the “Export Still Frame” method and importing a high-resolution image.
Audio syncing issues: When inserting freeze frames, be mindful of how they affect your audio synchronization. You may need to unlink and adjust audio clips separately.
Performance issues with Time Remapping: If your system struggles with Time Remapping effects, try nesting the clip with the effect applied or creating a energetic link to After Effects for more efficient processing.
Inconsistent freeze frame durations: Use the “Default Still Image Duration” setting in Premiere Pro’s preferences to set a consistent duration for imported still frames.
Finally
Mastering the art of Freeze Frame in Premiere Pro can significantly enhance your video editing toolkit. From the quick and easy Insert Frame Hold Segment to the more advanced Time Remapping technique, you now have a complete understanding of how to create and manipulate freeze frames in your projects.
Think of that the effectiveness of a Freeze Frame in Premiere Pro lies not just in its technical execution, but also in its strategic placement and creative application. As you practice these techniques, you’ll develop an intuition for when and how to use freeze frames to maximize their impact on your audience.
Experiment with different methods, combine them with other effects, and don’t be afraid to push the boundaries of your creativity. With these skills at your fingertips, you’re well-equipped to create compelling, professional-grade videos that attract dazzle your viewers and raise your storytelling.
Keep exploring, keep creating, and most importantly, have fun freezing time in your video projects!
How To Create A 3D Artist Portfolio Project – Perfect Excellence with Style
Introduction A compelling 3D Artist Portfolio is your gateway to success. It’s not just a collection of your best work but also narrative of your career, skills, and potential. Whether you’re a budding artist looking to break into the industry or a seasoned professional aiming to raise your course, crafting an outstanding Portfolio is crucial. […]
October 15, 2024
How Can i Get Proper Wwise Course For Software Learning
Wwise stands out as a powerful and essential tool for sound designers and audio programmers. As the demand for providing gaming experiences continues to grow, so does the need for professionals skilled in using Wwise. Whether you’re a beginner looking to break into the industry or an experienced audio professional aiming to expand your skill […]
October 14, 2024
Can I Use Wwise Software As Commercial Video Game Developers?
Introduction As the industry continues to push boundaries, developers are constantly seeking powerful tools to bring their sonic visions to life such as Wwise Software. Wwise is one of the powerful audio middleware solutions that have been deeply entrenched in the game development environment. However, one question always seems to emerge, even to this day, […]