Blender, the versatile open-source 3D creation suite, continues to grow in popularity among statistical artists, animators, and VFX professionals. One of its greatest strengths is the extensibility offered through add-ons—custom extensions that enhance functionality and streamline workflows. Among these, VFX Grace Addon has come out as a valuable tool for professionals and addicts looking to raise their Blender projects.
VFX Grace offers a collection of specialized add-ons designed to address specific needs within the Blender ecosystem. Whether you’re working on character animation, advanced hair systems, or technical quality checks, these tools can significantly boost your productivity and creative potential. The Morphic Studio shares the complete process of adding VFX Grace Addon to your Blender installation, make certain you can take full advantage of these powerful extensions.
Follow VFX Grace Add-ons
Before diving into the installation process, it’s worth Follow what makes VFX Grace Addon valuable additions to your Blender toolkit.
What Are VFX Grace Add-ons?
VFX Grace Addon are specialized extension developed to enhance Blender’s native capabilities. Created by experienced developers with deep Follow of production workflows, these add-ons address common pain points and introduce new functionalities that aren’t available in the default Blender installation.
Popular VFX Grace Tools
The VFX Grace ecosystem includes several notable tools:
CheckToolBox: A complete quality assurance toolkit for 3D models
Hair Add-ons: Specialized tools for creating and managing complex hair systems
Animation Assistants: Tools that streamline character animation workflows
Material Enhancers: Add-ons that expand Blender’s material creation capabilities
Each tool is designed with professional workflows in mind, offering intuitive interfaces and performance-optimized code.
Prerequisites for Installation
Before installing VFX Grace Addon, ensure you have:
A compatible version of Blender (typically versions 2.80 to 3.5+)
Sufficient system resources to run both Blender and the add-on
Administrative privileges on your computer (for installation purposes)
A reliable internet connection to download the add-on files
Detailed Installation Process
Let’s break down the installation process into detailed steps to ensure a smooth experience.
Step 1: Acquiring the VFX Grace Add-on
The first step in the process is obtaining the VFX Grace add-on package:
Choose your marketplace: VFX Grace add-ons are available through various platforms including:
Select the specific add-on: Browse the available VFX Grace tools and select the one that matches your needs.
Purchase and download: Complete the purchase process and download the add-on file. It should come packaged as a .zip file.
Save to a memorable location: Store the .zip file in a location you can easily access later.
Note: Do not unzip the downloaded file. Blender requires the add-on to remain in .zip format for proper installation.
Step 2: Accessing Blender Preferences
With your add-on file ready, the next step is to open Blender’s preferences panel:
Launch Blender: Open your Blender application.
Access Preferences: There are several ways to access the Preferences menu:
From the top menu, select Edit → Preferences
Use the basic board shortcut: Ctrl + Alt + U (Windows/Linux) or Cmd + , (Mac)
In newer Blender versions, you can click on the menu icon in the top-left corner and select Preferences
Negotiate to Add-ons: In the Preferences window, click on the Add-ons tab in the left sidebar.
Step 3: Installing the Add-on
Now you’re ready to install the VFX Grace add-on:
Initiate installation: Click the Install button located in the top-right corner of the Add-ons panel.
Locate the file: In the file browser that appears, negotiate to where you saved the VFX Grace add-on .zip file.
Select and install: Click on the .zip file to select it, then click the Install Add-on button.
Wait for completion: Blender will process the installation. Depending on the size of the add-on, this may take a few moments.
Step 4: Enabling the Add-on
Installing the add-on is only half the process. You must also enable it:
Search for the add-on: Use the search bar in the top-right of the Add-ons panel to find your newly installed VFX Grace add-on. Type “VFX Grace” or the specific name of the tool (like “CheckToolBox”).
Enable the add-on: Once you locate the add-on in the list, check the box next to its name to enable it.
Apply changes: In some Blender versions, you may need to click an “Apply” or “Save Preferences” button to finalize the changes.
Step 5: Verifying Installation
After enabling the add-on, it’s important to verify that it’s working correctly:
Check the interface: Look for new panels, buttons, or menu items related to the VFX Grace add-on. Depending on the specific tool, these might appear in:
The N-panel (accessed by pressing N while in the 3D viewport)
Specific workspace modes like Edit Mode or Sculpt Mode
New tabs in existing panels
Test basic functionality: Try using a simple feature of the add-on to confirm it’s operational.
Step 6: Configuring Add-on Settings
Many VFX Grace add-ons come with customizable settings to match your workflow:
Access add-on preferences: In the Add-ons panel where you enabled the tool, you might see an arrow or expansion button next to the add-on’s name. Click it to reveal preference options.
Adjust settings: Configure the add-on according to your needs. Common settings include:
Performance options
Interface preferences
Default behaviors
Basic board shortcuts
Save preferences: After making adjustments, save your preferences to ensure they persist between Blender sessions.
VFX Grace Addon By The Morphic Studio
Troubleshooting Common Installation Issues
Even with a straightforward process, you might encounter some issues when installing VFX Grace add-ons. Here are solutions to common problems:
Add-on Not Appearing After Installation
If you can’t find the add-on after installation:
Check compatibility: Ensure the add-on is compatible with your Blender version.
Restart Blender: Sometimes a simple restart resolves visibility issues.
Verify the file integrity: Re-download the add-on if you suspect the file might be corrupted.
Add-on Enabled But Not Functioning
If the add-on is enabled but doesn’t seem to work:
Check the console: Open Blender’s console to look for error messages (Window → Toggle System Console on Windows).
Verify dependencies: Some add-ons require additional Python packages. Check the documentation for requirements.
Test in a new file: Create a new Blender file to rule out conflicts with your current project.
Version Conflicts
If you encounter version-related issues:
Check the supported Blender versions: VFX Grace add-ons typically support a range of Blender versions (e.g., 2.80–3.5).
Look for version-specific releases: Some developers offer different downloads for different Blender versions.
Consider updating Blender: If the add-on requires a newer version, consider updating your Blender installation.
Comparison of VFX Grace Tools
Here’s a useful comparison table of common VFX Grace add-ons to help you identify which tool might best suit your needs:
Add-on Name
Primary Function
Best For
Blender Compatibility
Typical Price Range
CheckToolBox
Quality assurance and model verification
Technical artists, QA specialists
2.80–3.5+
$40-60
Hair Systems
Advanced hair creation and styling
Character artists, grooming specialists
2.90–3.5+
$50-80
Animation Tools
Character animation enhancements
Animators, motion designers
2.83–3.5+
$30-60
Material Suite
Extended material creation capabilities
Look-dev artists, material specialists
2.80–3.5+
$45-70
Rigging Assistants
Automated rigging helpers
Technical animators, riggers
2.90–3.5+
$35-65
Making the Most of VFX Grace Add-ons
Once you’ve successfully installed your VFX Grace add-on, consider these tips to maximize its value:
Learning Resources
Official documentation: Always start with any documentation provided by the developer.
Video tutorials: Look for official or community-created tutorials on platforms like YouTube.
Community forums: Join Blender communities where you can ask questions about specific add-ons.
Workflow Integration
Create custom workspaces: Configure Blender workspaces that incorporate your new tools for specific tasks.
Set up basic board shortcuts: Assign custom shortcuts to frequently used add-on functions.
Build process templates: Create template files with your add-ons already configured for quick project starts.
Staying Updated
Check for updates: Regularly look for updates to ensure compatibility with newer Blender versions.
Follow developers: Subscribe to newsletters or social media accounts of the add-on developers.
Back up presets: Before updating, back up any custom presets or configurations you’ve created.
Advanced Tips for Power Users
For those looking to take their VFX Grace add-on usage to the next magnitude:
Automation and Scripting
Many VFX Grace add-ons expose Python APIs that allow for automation:
Batch operations: Script repetitive tasks across multiple files or objects.
Custom button creation: Add personalized buttons to access frequently used functions.
Integration with other add-ons: Create scripts that combine functionality from multiple add-ons.
Performance Optimization
To ensure smooth operation with complex add-ons:
Adjust settings: Fine-tune add-on settings based on your computer’s capabilities.
Instance management: Be mindful of how many instances or operations you run simultaneously.
Scene optimization: Keep your Blender scenes optimized to provide more resources for add-on operations.
Finally
Adding VFX Grace Addon to your Blender workflow represents a significant step toward enhancing your 3D production capabilities. The straightforward installation process—downloading the add-on, accessing Blender preferences, installing and enabling the tool, and configuring its settings—opens up new creative and technical possibilities within your familiar Blender environment.
As the Blender ecosystem continues to develop and progress, tools like VFX Grace Addon play an increasingly vital role in professional production pipelines. They bridge functionality gaps, streamline complex processes, and in the end, help artists and technical directors achieve their creative visions more efficiently.
Whether you’re a solo artist looking to enhance your projects or part of a larger production team seeking to standardize and optimize workflows, VFX Grace Addon offers valuable solutions that can dramatically improve your Blender experience. By following this guide, you’ve taken an important step toward harnessing these powerful tools and expanding your creative potential.
Think of how mastering any new tool takes time and practice. Experiment with your newly installed add-ons, take a look at their capabilities and don’t hesitate to engage with the broader Blender community for support and inspiration. The ride to becoming proficient with these specialized tools is as rewarding as the exceptional results they help you create.
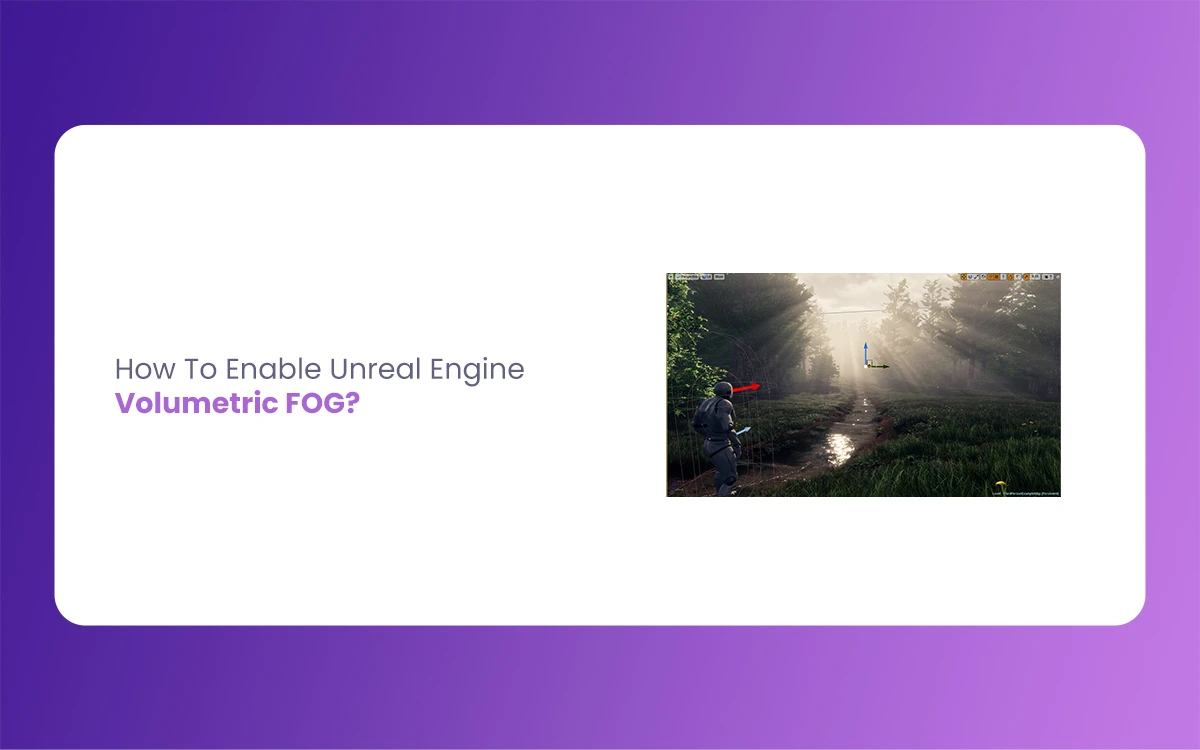
Introduction Volumetric fog is one of the most powerful atmospheric effects available in Unreal Engine Volumetric Fog, capable of transforming ordinary scenes into breathtaking environments with depth, mood, and realism. Unlike traditional fog techniques that simply fade distant objects, Unreal Engine Volumetric Fog simulates the actual scattering of light through three-dimensional volumes of air, creating […]
April 17, 2025
How To Create God Rays Unreal Engine 5 By Morphic Studio
God rays, also known as crepuscular rays or volumetric lighting, are stunning visual effects that create dramatic shafts of light penetrating through scenes. These beautiful atmospheric effects add depth and realism to any virtual environment. The Morphic Studio shares information about three proven methods to achieve God Rays Unreal Engine 5, each offering different advantages […]
April 15, 2025
How to Create A Custom Making Ancient Samurai in Unreal Engine
Developing a customizable ancient Ancient Samurai in Unreal Engine involves several interconnected components, from skeletal setups to animation integration and optimization techniques. The Morphic Studio shares information about the entire process, providing the technical foundation needed to create an authentic, modular samurai character ready for your game or project. Follow the Foundation: Skeleton and Modular […]