Making photorealistic Plastic Toy Look-Alikes in Blender is one of the biggest things going these days in 3D animation. No matter if you’re an avid hobbyist, a game developer, or a professional animator; learning this particular skill will pay off tenfold in your projects. In this tutorial, we will go through how to make cool Plastic Toy Look-Alikes in Blender, one of the most powerful and feature-rich 3D creation suites available.
Introduction
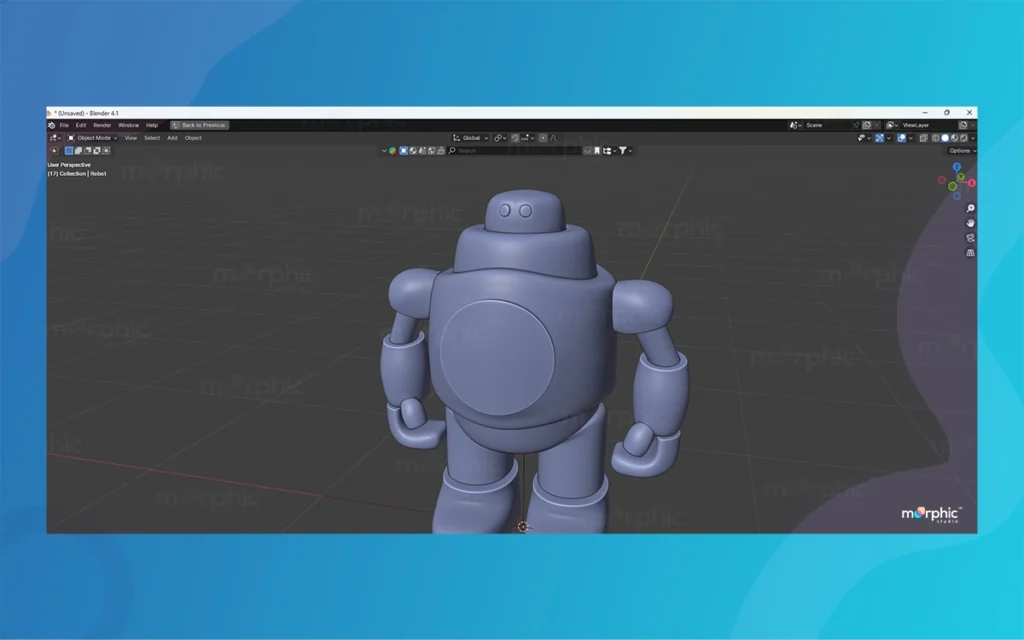
Blender is an open-source creation software, offering tools and features for a very diverse range of applications, from basic modeling to advanced shading and rendering, all in trying to create plastic toy look-alikes from scratch.
Follow this step-by-step process in Blender to create Plastic Toy Look-Alikes, focusing on the three key aspects below.
Modeling Techniques
Shading for Plastic Effect
Rendering
Let’s dive in and discover how to transform your ideas into stunning 3D Plastic Toy replicas.
Plastic Toy Look-Alikes in Blender By The Morphic Studio
1. Modeling Techniques
The basic shape and structure of every great 3D toy model are the foundation. In this section, we’ll take a closer look at the modeling techniques that will help you get the perfect base for your plastic toy look-alike.
Basic Shape Drawing
To begin your plastic model toy, you basically initiate with the root forms of it. Blender gives you several wooden modeling shapes to start with:
Cubes: Ideal for blocky toys or as a base for more complex shapes
Spheres: Perfect for rounded elements like heads or joints
Cylinders: Great for limbs or cylindrical components
Custom meshes: For more unique or complex toy designs
When working with these shapes, keep in mind two essential modifiers that can significantly enhance your model’s quality:
Subdivision Surface Modifier: A tool that smoothes your model by subdividing the mesh further. Want that extra, nice, shiny look? Subdivision is almost the ultimate thing, since this ensured the specific smooth, round surfaces common in plastic toys.
Solidify Modifier: This modifier adds thickness to the model where flat surfaces are available, and it helps to create a more realistic solid look, just as plastic toys do.
While creating these shapes, remember two important modifiers that can enhance your model qualitatively:
Subdivision Surface Modifier: This smooths out your model by subdividing the mesh and makes it appear extraneous. This modifier is quite helpful when someone wishes to get smooth, elliptical kinds of surface, often received in plastic toys.
Solidify Modifier: This modifier adds thickness to your model in case the model consists of flat surface areas only. That gives a more realistic appearance and a solid one, resembling that of plastic toys.
Detailing
To raise your model from basic to realistic, incorporate fine details that are characteristic of plastic toys. Two basic elements to focus on are:
Mold Lines: These subtle lines appear where two halves of a plastic mold meet during the manufacturing process. Create these using edge loops or by carefully manipulating the geometry of your model.
Seams: Similar to mold lines, seams appear where different parts of the toy connect. Add these details using edge loops or by creating slight indentations in your model’s surface.
Plastic Toy Look-Alikes in Blender By The Morphic Studio
Advanced Modeling Techniques
For more complex toy designs, consider engage these advanced modeling techniques:
Boolean Operations: Use these to combine or cut shapes, perfect for creating intricate details or hollow parts.
Sculpting: For organic shapes or highly detailed expanses, Blender’s sculpting tools can be helpful.
Retopology: After sculpting, use retopology to create a clean, optimized mesh that’s easier to work with and render.
2. Shading for Plastic Effect
Once you’ve created your toy’s basic structure, the next step is to give it that characteristic Plastic look. This is where Blender’s powerful shading capabilities come into play.
How to Use the Principled BSDF Shader
The Principled BSDF (Bidirectional Scattering Distribution Function) shader is your go-to tool for creating realistic materials in Blender, including plastic. Here’s how to set it up:
In the Shading workspace, add a Principled BSDF shader to your material.
Set the Base Color to your desired toy color. Bright, saturated colors often work well for plastic toys.
Adjust Roughness and Specularity
To achieve that classic plastic sheen:
Roughness: Decrease the Roughness value to make the surface appear smoother. A value between 0.1 and 0.3 typically works well for a shiny plastic look.
Specularity: Increase the Specular value to enhance reflections, mimicking the way light interacts with plastic surfaces.
Set the Index of Refraction (IOR)
The Index of Refraction determines how light bends as it passes through a material. For most plastics:
Set the IOR to approximately 1.46 in the Principled BSDF shader.
This value creates realistic light refraction, enhancing the plastic-like appearance of your model.
How to Add Wear and Tear
To make your toy look more realistic and less “perfect,” consider adding some subtle imperfections:
Step#1. Download or create fingerprint and scratch textures.
Step#2. Connect these textures to the Roughness input of your Principled BSDF shader.
Step#3. Use a Color Ramp node to fine-tune the influence of these textures, ensuring they don’t overpower the general plastic look.
Plastic Toy Look-Alikes in Blender By The Morphic Studio
3. Lighting and Rendering
The final step in creating convincing plastic toy look-alikes is setting up appropriate lighting and rendering your scene.
Lighting Setup
Proper lighting is crucial for showcasing the plastic properties of your toy:
Step#1. Use a combination of point lights and spot lights to create sharp says on your model.
Step#2. Consider using an HDRI (High Energetic Range Imaging) environment for more realistic, global illumination.
Camera Positioning
Carefully position your camera to says the basic features of your toy:
Step#1. Use multiple camera angles to showcase different aspects of your model.
Step#2. Experiment with close-up shots to emphasize the plastic texture and details.
Render Settings
To achieve the best results:
Step#1. Use the Cycles render engine for its superior realism and light handling capabilities.
Step#2. Enable Filmic Color Management for better contrast and color depth.
Step#3. Adjust samples and light bounces to balance quality and render time.
Plastic Toy Look-Alikes in Blender By The Morphic Studio
Finally
Creating Plastic Toy Look-Alikes in Blender is a rewarding process that combines technical skill with artistic creativity. By following the techniques outlined in this guide – from basic modeling to advanced shading and rendering – you can create stunning, realistic plastic toy replicas that are sure to impress.
Remind, practice and experimentation are basic to mastering these techniques. Don’t be afraid to try different approaches and push the boundaries of what’s possible in Blender. With time and dedication, you’ll be creating professional-quality plastic toy look-alikes that are indistinguishable from the real thing.
Useful Table: Quick Reference Guide for Plastic Toy Creation in Blender
Quick Reference Guide for Plastic Toy Creation in Blender
Aspect
Technique/Setting
Value/Signs
Modeling
Basic Shapes
Cubes, Spheres, Cylinders
Subdivision Surface Modifier
Magnitude 2-3 for smoothness
Solidify Modifier
Thickness: 0.01-0.05 units
Mold Lines
Use edge loops or geometry manipulation
Shading
Principled BSDF Shader
Base shader for plastic effect
Base Color
Bright, saturated colors
Roughness
0.1-0.3 for shiny plastic
Specularity
0.7-0.9 for enhanced reflections
Index of Refraction (IOR)
~1.46 for most plastics
Wear and Tear
Use fingerprint/scratch textures in Roughness input
Lighting
Basic Light
Point or spot light for sharp says
Fill Light
Soft expanse light or HDRI for general illumination
Rendering
Engine
Cycles for realism
Color Management
Filmic for better contrast and color
Samples
500-1000 for balance of quality and render time
Denoising
Enable for cleaner final renders
This table provides a quick reference for the basic techniques and settings discussed in the article. It can serve as a handy guide for readers as they work on their own Plastic Toy Look-Alikes in Blender.
Best 5 Software and Tools for Interior Design In 2025
Interior Design has develop progress dramatically with technology, transforming how professionals and addict bring their creative visions to life. The Morphic Studio shares the top five software and tools to transform the interior design environment in 2025, enabling designers to create stunning spaces with unprecedented efficiency and precision. The Evolution of Interior Design Technology The […]
February 17, 2025
Best Applications of 3D Printing in Art By Morphic Studio
3D Printing in Art technology has emerged as an innovative force in the art world, fundamentally changing how artists conceive, create, and present their work. This technological innovation has opened up unprecedented possibilities for artistic expression, pushing the boundaries of what’s possible in contemporary art. The Morphic Studio shares the transformative applications of 3D Printing […]
February 14, 2025
Why 3D Rendering Is a Game-Changer?
In today’s rapidly increasing technological environment, 3D Rendering has emerged as a transformative force across multiple industries. With the market projected to surpass $6 billion by 2025, this powerful visualization technology transforms how businesses communicate, design, and sell their products and services. The Morphic Studio shares information about the profound impact of 3D Rendering and […]