In 3D animation, becoming proficient in the fundamentals is significant for creating compelling and realistic animations. One of the most iconic and essential exercises for beginners is the bouncing ball animation. This simple yet powerful exercise encapsulates many core principles of animation, including timing, spacing, squash and stretch, and anticipation. The Morphic Studio shares the complete information to help you create your first ball-bounce 3D Animation in Maya, one of the industry’s leading 3D animation software packages.
Whether you’re an aspiring animator, a curious hobbyist, or a student looking to expand your skill set, this tutorial will provide you with a solid foundation in 3D Animation in Maya techniques. By the end of this article, you’ll have created a realistic and engaging ball bounce animation, and more importantly, you’ll have gained adjective awareness of the art and science of bringing objects to life in a 3D environment.
Let’s embark on this exciting ride into 3D animation, where physics meets artistry, and a simple sphere can become a character with personality and life.
Setting the Stage: Preparing Your Maya Environment
Before we dive into the animation process, it’s essential to set up your Maya environment correctly. This initial step will ensure a smooth workflow and help you focus on the creative aspects of animation without technical hiccups.
Launching Maya and Creating a New Project
Step#1. Begin by launching Autodesk Maya on your computer.
Step#2. Once Maya is open, negotiate to File > New Project.
Step#3. Choose a suitable location for your project and give it a descriptive name, such as “Ball Bounce Animation.”
Step#4. Click “Accept” to create the new project.
Creating Your Bouncing Ball
Now that we have our project set up, let’s create the star of our animation – the ball.
Step#1. In the top menu, negotiate to Create > Polygon Primitives > Sphere.
Step#2. Click and drag in the viewport to create a sphere.
Step#3. Adjust the sphere’s attributes in the Channel Box to ensure it’s the right size for your scene. A radius of about 1 unit is typically a good starting point.
Configuring the Time Slider
The Time Slider in Maya is where you’ll set the duration of your animation.
Step#1. Locate the Time Slider at the bottom of your Maya interface.
Step#2. By default, it may be set to 24 frames (1 second at 24 fps).
Step#3. For our ball bounce animation, we’ll extend this to 110 frames to give us ample time to create multiple bounces.
Step#4. To adjust this, right-click on the Time Slider and select “Set End Time.”
Step#5. Enter 110 in the dialog box and click “Apply.”
The Art of Basic framing: Bringing Your Ball to Life
With our scene set up, we’re ready to start animating. Basic framing is the heart of 3D Animation in Maya, allowing us to define basic poses and let the software interpolate the movement between them.
Setting the Initial Basicframe
Step#1. Select your ball in the viewport.
Step#2. Move to frame 1 in the Time Slider.
Step#3. In the Channel Box, find the Translate Y attribute (which controls vertical position).
Step#4. Set the Translate Y value to 31 units. This will be the starting height of your ball.
Step#5. Right-click on the Translate Y attribute and select “Basic Selected” to set your first basic frame.
Animating the First Bounce
Now, let’s create the first bounce sequence:
Step#1. Move to frame 9 in the Time Slider.
Step#2. Set the Translate Y value to 0 (ground magnitude) and create a basic frame.
Step#3. Go to frame 17 and set Translate Y back to 31 (peak of the next bounce). Set another basic frame.
3D Animation in Maya By The Morphic Studio
Creating Subsequent Bounces
To create a realistic bounce sequence, we’ll gradually decrease the height of each bounce:
Frame 24: Set Translate Y to 0 and basic frame.
Frame 31: Set Translate Y to 20 and basic frame.
Frame 38: Back to 0, basic frame.
Frame 45: Up to 12, basic frame.
Frame 52: Down to 0, basic frame.
Continue this pattern, gradually reducing the bounce height:
Frame 59: Y = 7
Frame 66: Y = 0
Frame 73: Y = 4
Frame 80: Y = 0
Frame 87: Y = 2
Frame 94: Y = 0
Frame 101: Y = 1
Frame 108: Y = 0
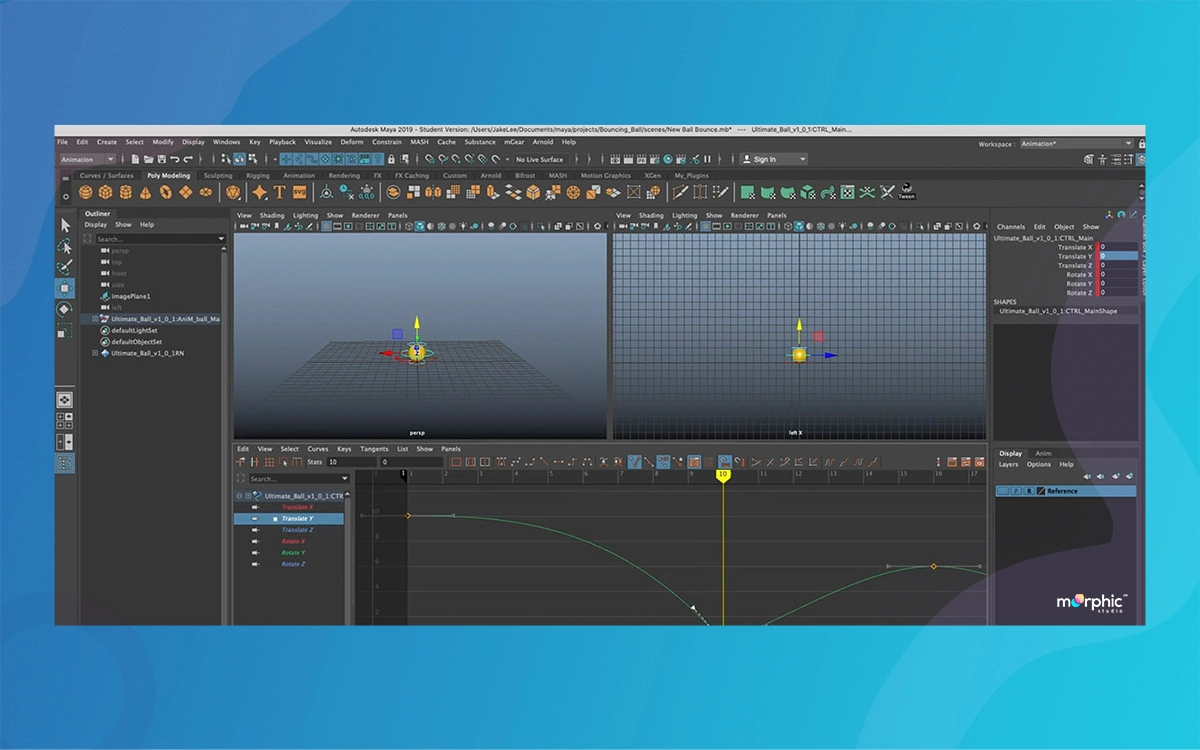
Refining Your Animation: The Power of the Graph Editor
To transform our basic framed animation into a smooth, realistic bounce, we’ll use Maya’s Graph Editor. This powerful tool allows us to fine-tune the interpolation between basic frames.
With your ball selected, open the Graph Editor by going to Window > Animation Editors > Graph Editor.
In the Graph Editor, you’ll see a curve representing your ball’s vertical movement over time.
Select the Translate Y curve.
Adjust the tangent handles at each basic frame:
At the peak of each bounce, widen the tangent handles to create a smoother, more natural arc.
At the impact frames (where the ball hits the ground), shorten the tangent handles to create a quicker drop and a more abrupt change in direction.
Adding Realism: Squash and Stretch
To enhance the realism of our animation, we’ll incorporate the principle of squash and stretch. This technique simulates the deformation of objects under the influence of motion and impact.
At each impact frame, slightly reduce the ball’s scale on the Y-axis to create a squash effect.
As the ball rises from each bounce, slightly increase its scale on the Y-axis to create a stretch effect.
Think of to basic frame these scale changes.
Here’s a table to guide you through the squash and stretch values:
Frame
Translate Y
Scale Y
1
31
1.0
9
0
0.8
17
31
1.1
24
0
0.85
31
20
1.05
38
0
0.9
45
12
1.02
52
0
0.95
Continue this pattern, gradually reducing the extremes of squash and stretch as the bounces become smaller.
Fine-Tuning Your Animation
With the basic bounce and squash-and-stretch in place, it’s time to refine your animation:
Play back your animation using the play button in Maya’s Time Slider.
Look for any irregularities or unnatural movements.
Use the Graph Editor to smooth out any harsh transitions.
Adjust the timing of your basic frames if needed to create a more natural rhythm to the bounces.
Consider adding slight horizontal movement to give your ball some personality and make the animation more interesting.
Adding Environmental Elements
To enhance the visual appeal of your animation, consider adding some simple environmental elements:
Create a plane to serve as the ground for your ball to bounce on.
Add a simple lighting setup to create shadows and depth.
If you’re feeling adventurous, try adding a simple backdrop or a few props to give context to your bouncing ball.
Rendering Your Animation
Once you’re satisfied with your animation, it’s time to render it:
Set up your camera angle to best showcase your bouncing ball animation.
Configure your render settings in Maya’s Render Setup window.
Choose an appropriate output format (e.g., MP4 or AVI).
Render a preview to check for any issues.
When you’re happy with the preview, render your final animation.
3D Animation in Maya By The Morphic Studio
At Last
You have just created your first ball bounce 3D Animation in Maya. This seemingly simple exercise has introduced you to many fundamental principles of animation, including:
Basic framing and timing
Using the Graph Editor for smooth motion
Applying squash and stretch for realism
Considering environmental elements
Basic rendering techniques
Think of animation as an art form that requires practice and patience. Be encouraged if your first attempt isn’t perfect – every great animator starts with a bouncing ball. Keep experimenting, refine your techniques, and have fun with the process.
As you continue your ride in 3D Animation in Maya, you’ll build upon these foundational skills to create increasingly complex and compelling animations. The principles you’ve learned here apply to animating characters, vehicles, and even abstract motion graphics.
We encourage you to look further by adding obstacles for your ball to interact with, experimenting with different materials and textures, or even giving it some character and personality through its movement.
The world of 3D Animation in Maya is vast and exciting, with creative possibilities. Your bouncing ball is just the beginning. Keep practising, stay curious, and never stop learning. Who knows? Your following animation might be the opening scene of a blockbuster movie or the centre piece of an innovative video game.
How To Create Ram Sita Character Animation in Blender By Morphic Studio For Youforia_by_hrutul
By Morphic Studio for Youforia_by_hrutul Character animation in Blender is both an art and a technical challenge. Particularly when creating characters with cultural and historical significance like Ram sita Blender Animation. The entire production pipeline, from concept to final render, offers technical awareness and creative best practices for animators at Morphic Studio working on the […]
March 11, 2025
How To Create Tiger 3D Animation Model – Siberian Tiger Animated
Creating a realistic Tiger 3D animated model of a majestic Siberian tiger is an ambitious but rewarding project for 3D artists. The Morphic Studio shares information about the entire process from the initial concept to the final animation, providing professional awareness and technical details at each stage. Introduction A Siberian tiger (Panthera tigris altaica) is […]
March 8, 2025
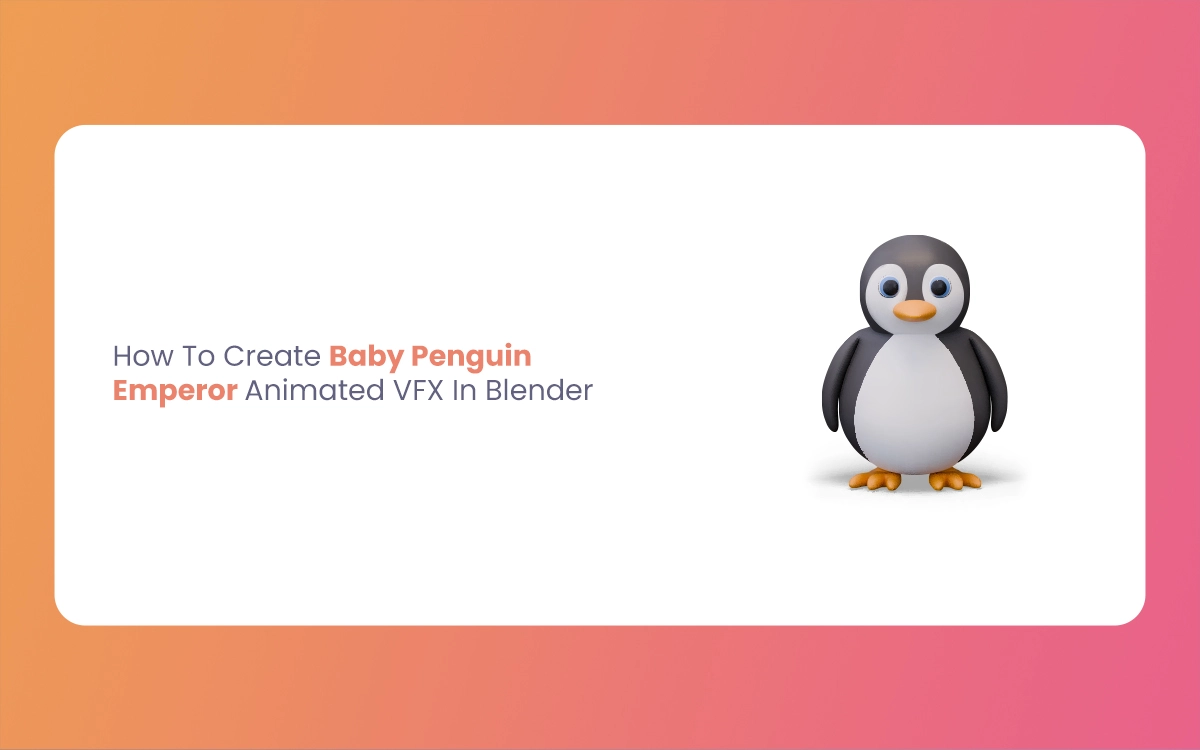
How To Create Baby Penguin Emperor Animated VFX In Blender
Creating a realistic and adorable Baby Penguin Emperor in Blender requires attention to detail across modeling, texturing, fur, rigging, animation, and rendering. The Morphic Studio shares the tutorial process, providing professional techniques used in the VFX industry to bring your penguin to life. 1. Reference and Planning Gathering References Before opening Blender, collect high-quality reference […]