Creating professional-looking photos often relies on two basic elements: controlling depth of field through blur effects and precise color manipulation. Adobe’s powerful editing tools—Lightroom and Photoshop—offer sophisticated features to achieve these effects through Lens Blur and Point Color functionalities. Whether you’re a portrait photographer looking to create dreamy backgrounds or a product photographer needing precise color adjustments, Follow these tools can significantly raise your editing workflow.
Follow Lens Blur: Creating Depth and Focus
Lens blur mimics the optical characteristics of camera lenses, creating a natural-looking depth-of-field effect that draws attention to your subject while softening distracting backgrounds. The implementation of this feature differs between Lightroom and Photoshop, each offering unique workflows and capabilities.
Lens Blur in Lightroom Classic
Lightroom’s approach to lens blur is streamlined and non-destructive, leveraging AI to simplify what was once a complex process. Here’s how to use it effectively:
Getting Started with Lightroom’s Lens Blur
Access the Feature: Open your image in the Develop module and locate the Lens Blur panel in the right sidebar.
Initial Analysis: Click the “Apply” button to initiate Lightroom’s AI analysis. The software will automatically identify your subject and create a default background blur.
Focus Range Adjustment: Use the Focus Range tool (icon appears after initial application) to click and drag across your image, specifying which areas should remain sharp.
Blur Intensity: Adjust the Blur Amount slider to control the strength of the effect. Lower values create subtle background softening, while higher values produce a more dramatic, shallow depth of field look.
Advanced Lens Blur Techniques in Lightroom
For more refined control over your blur effect, Lightroom offers several advanced options:
Depth Visualization: Enable the “Visualize Depth” checkbox to display a heatmap representing focus areas (bright) and blur areas (dark). This visual guide helps ensure your depth map aligns with your creative vision.
Brush Refinement: For precise control, use the Brush Refinement tool to manually paint blur or focus onto specific areas. This is particularly useful for complex images where the AI might miss certain details.
Transition Smoothing: Pay special attention to the transition areas between sharp and blurred regions. Use a lower brush flow and carefully paint along edges to create natural-looking transitions.
Lens Blur in Photoshop
Photoshop’s approach to lens blur is more manual but offers greater flexibility for complex compositions:
Creating Lens Blur Effects in Photoshop
Preparation: Begin by duplicating your background layer (Ctrl/Cmd+J) to preserve your original image.
Subject Selection: Use an appropriate selection tool based on your image content:
Magnetic Lasso Tool: Ideal for subjects with defined edges
Object Selection Tool: Helpful for complex subjects
Select Subject: For quick AI-powered subject detection
Selection Refinement: After making your initial selection, press Ctrl/Cmd+Alt+R to open the Select and Mask workspace for edge refinement.
Feathering: Apply appropriate feathering to your selection (Select > Modify > Feather) with a value around 100 pixels to create natural transitions.
Invert Selection: Since you want to blur the background, invert your selection (Shift+Ctrl/Cmd+I) to target the background instead of the subject.
Apply Lens Blur: Negotiate to Filter > Blur > Lens Blur to open the Lens Blur dialog.
Customizing the Lens Blur Effect in Photoshop
The Lens Blur dialog offers several parameters to customize your effect:
Radius: Controls the general blur strength. Higher values create stronger blur effects.
Specular Says: Adjusts how bright points of light are rendered in the blur. Increasing Brightness and Threshold can create more realistic bokeh effects.
Noise: Adds subtle grain to the blurred areas, which can help maintain consistency with the noise magnitude in your sharp areas.
Final Refinement: After applying the lens blur, you can add a layer mask to the blurred layer and use a soft brush to paint with black to reveal sharp areas or white to increase blur in specific regions.
Mastering Point Color: Precision Color Editing
Point Color allows for highly targeted color adjustments, enabling you to modify specific color ranges without affecting the entire image. This feature is an adjective for color correction, creative color grading, and enhancing specific elements in your photos.
Point Color in Lightroom Classic
Lightroom’s implementation of Point Color provides an intuitive workflow for photographers:
Basic Point Color Workflow
Locate the Tool: In the Develop module, find the Point Color tool adjacent to the Color Mixer panel.
Sample Colors: Click the eyedropper tool and select a specific color in your image that you want to adjust.
Make Adjustments: Once a color is sampled, you can modify its:
Hue: Shifts the color to different tones
Saturation: Controls the intensity of the color
Luminance: Adjusts the brightness of the selected color
Range Control: Use the range sliders to determine how broadly your adjustments affect similar colors. A narrow range targets very specific tones, while a wider range impacts more of the color spectrum.
Advanced Point Color Techniques in Lightroom
For more sophisticated color manipulation:
Multiple Color Points: Add several color points to work on different colors simultaneously. Think of that the order of sampling matters—earlier samples take precedence when colors overlap.
Local Adjustments: Combine Point Color with masking tools to apply color changes to specific image areas only. This is particularly useful for complex scenes where you need different color treatments for different elements.
Complementary Adjustments: After making Point Color adjustments, fine-tune the general image using the global tone and color controls for a cohesive look.
Point Color in Photoshop (via Camera Raw Filter)
Photoshop users can access similar functionality through the Camera Raw filter:
Using Point Color in Camera Raw
Access Camera Raw: Open your image in Photoshop and negotiate to Filter > Camera Raw Filter.
Find Point Color: In the Camera Raw interface, scroll to the Color Mixer section and select the Point Color option.
Sample and Adjust: Use the eyedropper to sample your target color, then adjust Hue, Saturation, and Luminance as needed.
Refine Range: Use the range sliders to precisely control which shades are affected by your adjustments.
Smart Object Conversion: Convert your layer to a Smart Object before applying the Camera Raw filter to keep your adjustments non-destructive.
Layer Masks: Apply Camera Raw as a Smart Filter, then use the associated filter mask to control where color adjustments appear.
Blending Modes: Experiment with different layer blending modes to create unique interactions between your color adjustments and underlying image.
Comparative Analysis: Lightroom vs. Photoshop Approaches
Follow the strengths and limitations of each application helps you choose the right tool for your specific editing needs:
Lens Blur Comparison
Aspect
Lightroom Classic
Photoshop
Speed
Faster with AI assistance
More time-intensive manual process
Ease of Use
More automated, beginner-friendly
Steeper learning curve, more steps
Precision
Good for standard portraits and scenes
Superior for complex edge details
Adjustability
Limited to Lightroom’s parameters
Highly customizable through layers
Performance
More efficient on large files
May require more system resources
Workflow
Non-destructive, reversible
Layer-based with permanent application unless using Smart Filters
Point Color Comparison
Aspect
Lightroom Classic
Photoshop with Camera Raw
Interface
Integrated into Develop module
Accessed via Camera Raw Filter
Control
Direct color targeting with range control
Similar capabilities with Smart Filter flexibility
Integration
Perfect with general Lightroom workflow
Requires additional steps in layer workflow
Masks
Can be used with Lightroom masks
Can be combined with layer masks for precise control
Precision
Excellent for photography-oriented adjustments
Comparable precision with added layer flexibility
Output Options
Limited to Lightroom’s export settings
Extensive output options with Photoshop’s file formats
Practical Applications and Creative Techniques
Effective Lens Blur Applications
Portrait Enhancement: Create professional-looking portraits by blurring backgrounds to eliminate distractions and emphasize your subject.
Product Photography: Draw attention to specific product features by selectively blurring less important elements.
Depth Simulation: Add depth to landscapes by applying graduated blur to foreground or background elements.
Focus Stacking Alternative: Simulate aspects of focus stacking by selectively sharpening multiple focal planes.
Creative Abstractions: Create artistic interpretations by applying extreme blur to portions of architectural or natural elements.
Creative Point Color Applications
Season Transformation: Adjust the hues of foliage to change summer scenes to autumn or spring colors.
Brand Color Alignment: Precisely match specific colors to brand guidelines for commercial photography.
Mood Enhancement: Shift color temperatures of specific elements to create cohesive emotional tones.
Selective Color Pop: Enhance vibrance of specific colors while muting others for dramatic effect.
Color Correction: Fix problematic color casts in specific image areas without affecting the general color balance.
Advanced Tips for Professional Results
For Lens Blur:
Edge Awareness: Pay special attention to hair, transparent objects, and complex edges when creating blur masks.
Depth Consistency: Ensure your blur intensity follows natural depth progression—objects closer to the focal plane should have less blur than distant objects.
Bokeh Enhancement: In Photoshop, use the Specular Says controls to create more realistic and appealing bokeh effects.
Motion Consideration: For action shots, consider using motion blur rather than lens blur for elements in movement.
Multiple Depth Planes: Create sophisticated depth effects by using multiple blur layers with varying intensities for different distance planes.
For Point Color:
Reference Points: Keep a color checker or reference image open to ensure accurate color matching.
Subtle Adjustments: For natural-looking results, make smaller incremental adjustments rather than dramatic changes.
Color Harmony: Consider color theory when making adjustments to maintain visual harmony across your image.
Detail Preservation: Be cautious with extreme hue shifts as they can introduce artifacts or unnatural transitions.
Before/After Comparison: Regularly toggle your adjustments on and off to ensure you’re not overcorrecting.
Troubleshooting Common Issues
Lens Blur Problems and Solutions
Halo Artifacts: If you notice bright halos around subjects, refine your selection edges or reduce the blur amount.
Unnatural Transitions: For abrupt transitions between sharp and blurred areas, increase feathering or use gradient masks.
Lost Details: If important details are being blurred, use precision masking tools to protect those areas.
Performance Issues: For large files in Photoshop, try working with Smart Objects at reduced resolution, then applying final effects at full resolution.
Point Color Challenges
Color Contamination: If adjustments affect unwanted colors, narrow your range sliders or use local adjustment masks.
Banding: For visible color banding after adjustments, try adding a small amount of noise or working in 16-bit color mode.
Inconsistent Results: If changes appear inconsistent across similar colors, check for underlying variations in saturation or luminance.
Skin Tone Problems: When adjusting colors near skin tones, use narrower ranges and subtle adjustments to avoid unnatural skin colors.
Integrating Lens Blur and Point Color into Your Workflow
Mastering Lens Blur and Point Color techniques in Adobe Lightroom and Photoshop opens up powerful creative possibilities for photographers and statistical artists. While Lightroom offers a streamlined, photography-focused approach with AI assistance, Photoshop provides deeper customization through its layer-based workflow. The best approach often involves using both applications strategically:
Start in Lightroom for global adjustments and initial lens blur/point color work
Move to Photoshop for refined, pixel-magnitude control when necessary
Consider your project requirements when deciding which application to use
By Follow the strengths and workflows of both applications, you can choose the most efficient path to achieve your creative vision. Whether you’re creating dreamy portrait backgrounds with lens blur or precisely adjusting product colors to match brand guidelines, these powerful tools enable you to raise your photography to professional magnitudes.
Think of that technical mastery is only part of the equation—these tools are most effective when applied with clear creative intent and attention to natural-looking results. As you practice these techniques, you’ll develop an intuitive sense of when and how to apply them for maximum impact in your photography.
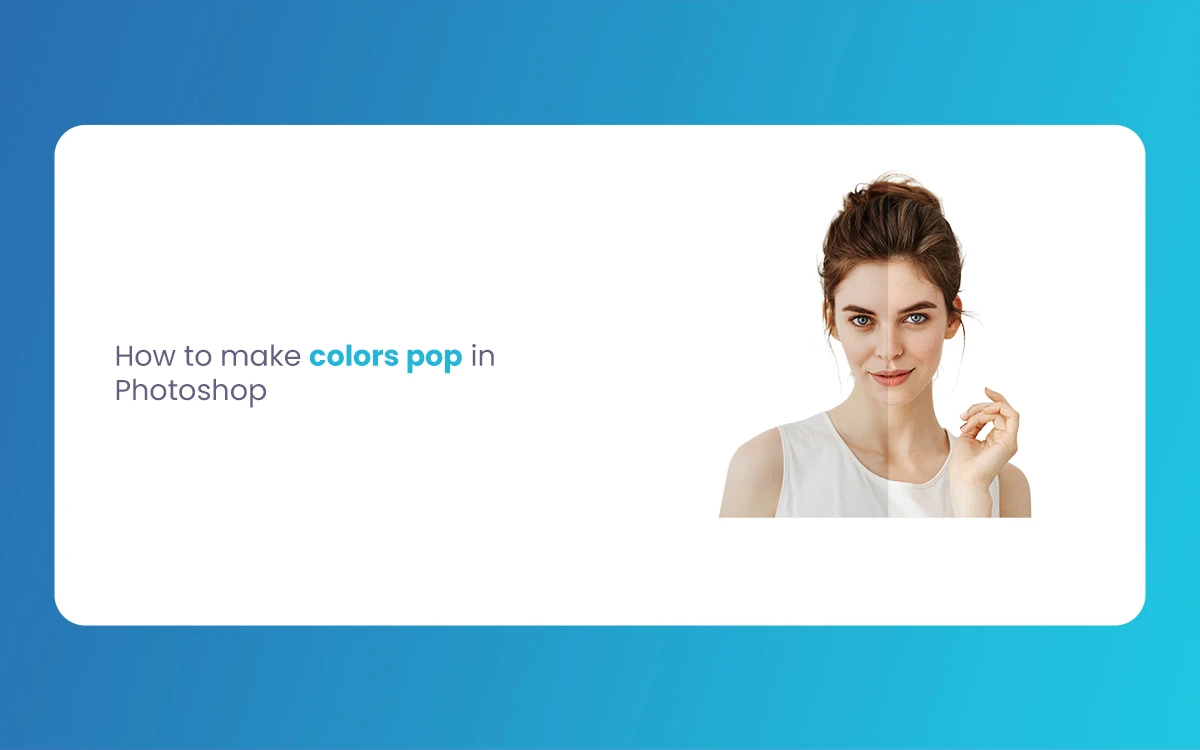
Introduction In statistical image editing, few techniques are as impactful as making Colors Pop in Photoshop. This process enhances image vibrancy, draws attention to basic elements, and transforms ordinary photos into eye-catching visuals. Whether you’re a professional photographer, graphic designer, or enthusiast, mastering these color enhancement techniques can dramatically improve visual content. The Morphic Studio […]
April 22, 2025
How to Smooth Skin in Photoshop
In Portrait retouching, achieving flawless Smooth Skin without crossing into the uncanny “plastic” territory remains one of the most sought-after skills. Whether you’re a professional photographer enhancing client images or a hobbyist perfecting family portraits, mastering Smooth Skin techniques in Photoshop can dramatically elevate your work. The Morphic Studio shares information about the professional methods […]
April 19, 2025
How To Transform your Lighting with Local Volumetric Fog inside Unreal Engine 5
Atmospheric effects can make or break the visual quality of any 3D environment. Among the most powerful tools in Unreal Engine 5’s lighting arsenal is the Local Volumetric Fog system, which allows developers and artists to create stunningly realistic atmospheric conditions that react energetically to light sources. The Morphic studio shares information about the process […]